Configuring Autotask SSO with Auth0
PERMISSIONS Security level with Admin permission to configure Resources/Users (HR) and system administrator role for the Identity Provider
NAVIGATION Left Navigation Menu > Admin > Admin Categories > Organization Settings & Users > Resources/Users (HR) > Security > Single Sign-On (OpenID Connect (OIDC))
NOTE This topic provides vendor-specific instructions. For general instructions, refer to Configuring Single Sign-On (OpenID Connect).
- Log into Auth0 with an Administrator account.
- On the dashboard, click New Client.
- Enter a name, such as Autotask.
- As a client type, select Regular Web Applications.
- Click Create.
- Click Settings.

- Copy the Client ID and Client Secret fields and paste them into the same fields on the Single Sign-On (OpenID Connect) page.
- Copy the Callback/Redirect URL from the Single Sign-On (OpenID Connect) page into the Allowed Callback URLs field.
- Scroll to the bottom of the page and click Show Advanced Settings.
- Click OAuth.
- Enter RS256 into the JasonWebToken Signature Algorithm field.
- Click Endpoints.
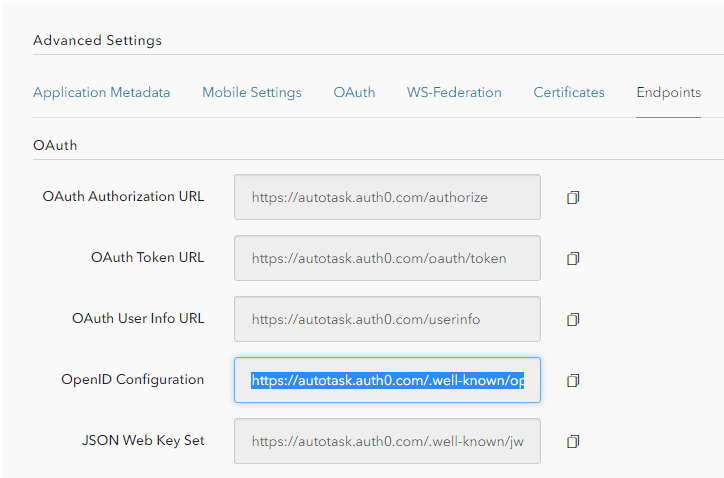
- Copy the OpenID Configuration field and paste it into the OpenID Connect Discovery Document* field on the Single Sign-On (OpenID Connect) page.
- Click Save Changes.


